Overview
Modal methods in Finite Element Analysis (FEA) are extensively used in dynamics because it can dramatically reduce the runtime of certain types of models. The most common use is for modal-transient and modal frequency response analysis.
Interestingly enough, it is a badly understood method with a common misconception being: “It solves in the frequency domain, then transforms back to the time domain in some-or-other method”. Nothing could be further from the truth: It is an easily understood method that simply uses superposition to approximate the displacement state.
In this article we will discuss the basics of the modal method: The assumptions made. The (surprisingly simple) mathematics behind it. Some improvements to the method are also included for completeness.
Since the modal method is an approximate method, the implications of the approximation and how to minimize the error will be discussed.
Lastly, the type of models which will either benefit or not benefit will be described.
It Starts with Superposition
The basic implementation of the modal method is only applicable to linear systems. This is because it requires the principle of superposition which in turn requires linearity. More on superposition at Superposition and its use in FEA
The dynamics equation as used in FEA, assuming viscous damping, is:

In this equation,  ,
,  and
and  are respectively the constant mass-, viscous damping- and stiffness-matrix.
  is the applied load at time
  .
.  and it’s time-derivatives
  and
and  are the displacement-, velocity- and acceleration-vectors at the same point in time.
The matrices is of size  and the vectors of size
  , where
  is the number of Degrees Of Freedom (DOF) in the model.
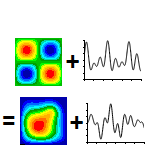
For the modal method, we limit the displacement vector to a subset of all possible displacements in such a way that we only allow certain deformation shapes, each with arbitrary scale-factor:

Where all  vectors are the allowed shapes, and
  is the corresponding scale factor at time .
We can write this in matrix format as:


Where  is an
is an  matrix containing the shapes, each shape being a column vector in the matrix, and
  is an
is an  column-vector containing the scale factor for each shape at time . As before, is the number of DOF in the model, while
  is the number of shapes we use for the approximation.
The matrix containing the shapes is not time-dependent. Only which contains the scale-factor for each mode is time-dependent. Therefore, the first and second time-derivatives of  becomes:


Substituting these into the dynamics equation:
Results in:

Pre-multiply this equation by the transpose of  :
:

Since ,  ,
,  and
and  are constant matrices and all known beforehand, we can perform the multiplication beforehand to obtain:

Where:


The subscript is convenient as it refers both to “Modal” (as in “modal mass matrix”) but also to the dimensions of the matrix: The modal matrices are of size  , with the number of shapes. This is because the dimensions of the matrix
  are:
are:

And all the internal dimensions disappear, leaving a final dimension of .
Note that the equation:
Has the exact same form as the original dynamics equation. The only difference is that we are now solving for the scale-factors as a function of time instead of directly for the DOF as a function of time. The method used to solve the equation does not change in any way.
If we wanted to perform transient analysis, the same time-integration method is used for the modal-transient as would be used for a direct-transient analysis.
For a frequency response analysis (see Frequency Response analysis – What is it?), the equation:

Stays the same, with the only difference being that the modal matrices are used:

Extracting Results
After calculating the scale factors as a function of time, we still need to go back to the displacements, stresses etc. over time. This process is very simple as we already have the equation needed namely:

From this, we can calculate the displacement as a function of time (and velocity and acceleration if needed).
Since the stress state is a function of displacement (and velocity for materials with damping), we can calculate the stress state directly from the displacements. But in doing this, we are performing a lot of unnecessary work: Since superposition holds, the same equation can be used to calculate any result  :
:

Where  represents the “shape matrix” for the result in question.
In other words, if we are interested in the stress in the x-direction for  , then would be a matrix with each column representing the stress in the x-direction for a shape.
Depending on the number of modes in the calculation, direct result extraction or superposition may be most efficient.
What Shapes Should We Use?
We didn’t explicitly say that we want to use mode-shapes, but we did allude to it. The reason for picking modes is that a structure LIKES deforming into its mode-shapes, so they end up being a good choice. They are most definitely not the only choice possible as we will explain in the section on Other Shapes.
Mode Shapes
If we pick mode-shapes, then an interesting effect occurs: Both the stiffness  and mass matrix
  becomes diagonal.
Furthermore, by correctly scaling the mode-shapes before use, we can scale the values on the diagonal of in such a way that all terms on the diagonal of is one. In other words, is the identity matrix  . This scaling is often referred to as “Mass Scaling” for obvious reasons.
With mass scaling, the terms on the diagonal of the stiffness matrix becomes the square of the mode-shapes’ natural frequencies (with the frequency in radians/s). If we temporarily neglect damping, then the modal-dynamic equation becomes:

This represents decoupled equations which can be solved independently with more efficient calculation methods.
The best part of this is that, since the solver knows that the modal mass matrix is the identity matrix and that the modal stiffness matrix is diagonal with the square of the natural frequencies on the diagonal, the matrix multiplications for and is never explicitly performed, but rather directly set up from the known properties of the matrices.
If the structure contained damper elements, then it is unlikely that the modal damping matrix will be diagonal. This will result in a coupled set of equations, but this isn’t a problem as the original dynamics equation was in any case coupled. The only downside is that it is slightly slower with a coupled system.
Interestingly enough, damping is the one thing that can be more accurately represented with a modal method than the direct methods. This is because it is easy to specify damping as a function of frequency by using what is referred to as “modal damping”. For modal damping, you specify a damping ratio as a function of frequency. A diagonal damping matrix is now calculated with the correct amount of viscous damping for each mode.
Other shapes
One of the reasons that mode-shapes work so well is that the response for all frequencies above the first major mode is dominated by the mode shapes.
However, for loads well below the first natural frequency, the structure will deform into the static deformed shape instead. If we have calculated enough modes so that the static shape can be reasonably well approximated using mode shapes, then we can expect good answers even for low frequencies.
For the case where we did not calculate enough modes to approximate the static deformation shape, the modal method will report inaccurate results unless we add some shapes.
A simple remedy is to calculate the static deformation, then include it as a shape. If used as-is, the property of a diagonal mass and stiffness matrix will disappear. Therefore, before adding the static shape(s), the mode shapes are removed from each static shape before appending the shape. After this step, the modal mass- and stiffness-matrix will again be diagonal.
The advantage of these static shapes (Nastran calls them “Residual Vectors”) is that they can dramatically improve the accuracy of the analysis while adding a very small amount of additional shapes.
To explain why let’s say a load is applied in a direction that matches mode number 7000. We would need to calculate at least 7000 modes before we have enough modes to represent that shape using only modes. A single static shape will yield very similar results.
Usually, a combination is used: Mode shapes and Static shapes. This is because they complement each other’s weaknesses.
How accurate are the modal methods?
The answer is an unhelpful “As accurate as you allow it to be”.
This is because for a linear dynamic analysis if you have extracted all modes, the answer will be the same as the direct method except for roundoff errors in the transformation process. It will run a lot longer though.
What we try to achieve is a balance between the number of modes + static shapes, and accuracy. Fortunately the recipe for “how many modes” is reasonably simple. The reason is that the effect of missing a mode can be estimated from the response of a 1 DOF system.
The following figure is for a single DOF spring-mass-damper system and plots the response for the displacement due to a load applied at some frequency relative to the displacement when the load is statically applied (i.e. the Dynamic Amplification). The ratio  is the ratio of applied frequency
  to the natural frequency
  .
.
From this curve, the dynamic amplification at a frequency ratio of around 0.7 is 2. This means that neglecting a mode at 1Hz while applying a dynamic load at 0.7 Hz would result in half the displacement. On the other hand, neglecting a 1Hz mode while applying a load at 0.2Hz would result in much smaller error – around 5%.

In other words, if we are running a transient analysis or a frequency response analysis with a maximum frequency of interest of 100 Hz, then we need to calculate modes up to some frequency significantly higher than 100Hz: Including all modes up to 500Hz, the expected error is around 5% for loads at 100 Hz. For modes up to 300Hz, it will be around 12% error for loads at 100Hz. For modes only up to 200Hz, the error will be around 33%.
Therefore, it is critically important to determine the maximum frequency we want to accurately integrate for transient analysis, or the maximum frequency to calculate the frequency response for. As an example, we may be interested up to 100Hz. Furthermore, an allowable error tolerance is required. From the allowed error tolerance we can determine the required frequency ratio. If the allowable error tolerance is 5%, a frequency ratio of about 5x is obtained from the equations for the Dynamic amplification factor. Multiplying the frequency ratio by the maximum frequency in our analysis (100Hz times 5 = 500Hz) determines the frequency of the highest mode we would need.
This is not the complete picture: In some cases, a mode does not contribute much, so the error may be less than estimated. However, we must be able to model the static deformation shapes, otherwise, we may not be able to represent low frequency (relative to the dominant modes in the direction of motion) behavior correctly.
Another helpful way is to look at the mass fraction (a topic for another time) for all the modes combined in the direction the load is applied. We want enough modes to represent the mass well. This may mean a mass fraction of 97% or 99% (or even more) depending on the required accuracy.
When to use a modal method
There are a couple of cases where the modal method is very efficient, others where there is no clear winner between direct methods and modal methods, and finally, those where the direct method is best.
Damping
Modal methods are significantly more flexible than direct methods when it comes to types of damping supported and the ability to accurately model frequency dependent damping. If damping is critically important, then the modal method will in most cases be the preferred method, even for cases where it may be slower than the direct method
Speed
The time-integration process for transient analysis (or the response calculation for frequency response analysis) is significantly faster than the direct methods. This is because of the massive reduction in DOF. As an example, a model with 1 000 000 DOF may only require 20 or 100 or 1 000 shapes in the modal method. Each shape represents one DOF, so the modal model is several orders of magnitude smaller and therefore quicker.
Calculating the shapes (modes and static) requires calculations which aren’t performed in a direct method. Therefore, if we have a lot more timesteps or frequency steps than shapes, the modal method should be faster. As the ratio of time (or frequency points) to number of modes increases, so does the efficiency of the modal methods.
The reverse is also true: If we need to calculate 100 time or frequency steps, but need 1000 modes for accurate calculation, then the direct methods will solve at least an order of magnitude faster than the modal method.
Conclusion
Modal methods are capable of accurate answers in a fraction of the time for models with many timesteps (for transient analysis) or frequency points (for frequency response) calculations relative to the number of shapes (mode shapes + static shapes).
With the ever-increasing mesh-densities and the required increase in resolution and/or duration, the models that can benefit from using a modal method is increasing over time.
Unfortunately, it is easy to get wrong answers by not calculating enough mode shapes and/or not requesting static shapes (residual vectors in Nastran terms). A rule-of-thumb is that you need to calculate modes up to between 3x and 5x the maximum frequency you want to accurately calculate in your transient response or frequency response analysis.